Symfony ya tiene integrada la gestión de usuarios mediante el bundle security que se instala mediante el siguiente comando:
composer require security
El primer paso es crear la entidad User usando el asistente de Symfony que se crea mediante
php bin/console make:user
The name of the security user class (e.g. User) [User]:
 > User

 Do you want to store user data in the database (via Doctrine)? (yes/no) [yes]:
 > yes

 Enter a property name that will be the unique "display" name for the user (e.g. email, username, uuid) [email]:
 > email

 Will this app need to hash/check user passwords? Choose No if passwords are not needed or will be checked/hashed by some other system (e.g. a single sign-on server).

 Does this app need to hash/check user passwords? (yes/no) [yes]:
 > yes

 created: src/Entity/User.php
 created: src/Repository/UserRepository.php
 updated: src/Entity/User.php
 updated: config/packages/security.yaml
Este es el código generado automáticamente
<?php

namespace App\Entity;

use App\Repository\UserRepository;
use Doctrine\ORM\Mapping as ORM;
use Symfony\Component\Security\Core\User\PasswordAuthenticatedUserInterface;
use Symfony\Component\Security\Core\User\UserInterface;

#[ORM\Entity(repositoryClass: UserRepository::class)]
#[ORM\UniqueConstraint(name: 'UNIQ_IDENTIFIER_EMAIL', fields: ['email'])]
class User implements UserInterface, PasswordAuthenticatedUserInterface
{
    #[ORM\Id]
    #[ORM\GeneratedValue]
    #[ORM\Column]
    private ?int $id = null;

    #[ORM\Column(length: 180)]
    private ?string $email = null;

    /**
     * @var list<string> The user roles
     */
    #[ORM\Column]
    private array $roles = [];

    /**
     * @var string The hashed password
     */
    #[ORM\Column]
    private ?string $password = null;

    public function getId(): ?int
    {
        return $this->id;
    }

    public function getEmail(): ?string
    {
        return $this->email;
    }

    public function setEmail(string $email): static
    {
        $this->email = $email;

        return $this;
    }

    /**
     * A visual identifier that represents this user.
     *
     * @see UserInterface
     */
    public function getUserIdentifier(): string
    {
        return (string) $this->email;
    }

    /**
     * @see UserInterface
     */
    public function getRoles(): array
    {
        $roles = $this->roles;
        // guarantee every user at least has ROLE_USER
        $roles[] = 'ROLE_USER';

        return array_unique($roles);
    }

    /**
     * @param list<string> $roles
     */
    public function setRoles(array $roles): static
    {
        $this->roles = $roles;

        return $this;
    }

    /**
     * @see PasswordAuthenticatedUserInterface
     */
    public function getPassword(): ?string
    {
        return $this->password;
    }

    public function setPassword(string $password): static
    {
        $this->password = $password;

        return $this;
    }

    #[\Deprecated]
    public function eraseCredentials(): void
    {
        // @deprecated, to be removed when upgrading to Symfony 8
    }
}
El paso siguiente es realizar la migración:
php bin/console make:migration
php bin/console doctrine:migrations:migrate
Además de crear el usuario, también se encarga de modificar la configuración de seguridad
# config/packages/security.yaml
security:
    # ...

    providers:
        app_user_provider:
            entity:
                class: App\Entity\User
                property: email
Esta configuración le indica que la clase que gestiona el usuario es App\Entity\User y que el campo que proporciona el login es el email
4.1 Crear el login
Ya sólo nos queda generar el formulario de login. Para ello ejecutamos
php bin/console make:controller Login
Que crea automáticamente un controlador para la ruta login y una plantilla.
Ahora hay que activar el formulario de login modificando la sección form_login
# config/packages/security.yaml
security:
    # ...

    firewalls:
        main:
            # ...
            form_login:
                # "app_login" is the name of the route created previously
                login_path: app_login
                check_path: app_login
Comprueba que este es el contenido del controlador generado. En caso contrario, modifícalo:
<?php

namespace App\Controller;

use Symfony\Bundle\FrameworkBundle\Controller\AbstractController;
use Symfony\Component\HttpFoundation\Response;
use Symfony\Component\Routing\Attribute\Route;
use Symfony\Component\Security\Http\Authentication\AuthenticationUtils;

final class LoginController extends AbstractController
{
    #[Route('/login', name: 'app_login')]
    public function index(AuthenticationUtils $authenticationUtils): Response
    {
        // get the login error if there is one
        $error = $authenticationUtils->getLastAuthenticationError();
        // last username entered by the user
        $lastUsername = $authenticationUtils->getLastUsername();
		return $this->render('login/index.html.twig', [
            'controller_name' => 'LoginController',
            'last_username' => $lastUsername,
            'error'         => $error,
          ]);
    }
}
Y modificamos la plantilla templates/login/index.html.twig:
{# templates/login/index.html.twig #}
{% extends 'base.html.twig' %}

{# ... #}

{% block body %}
    {% if error %}
        <div>{{ error.messageKey|trans(error.messageData, 'security') }}</div>
    {% endif %}

    <form action="{{ path('app_login') }}" method="post">
        <label for="username">Email:</label>
        <input type="text" id="username" name="_username" value="{{ last_username }}"/>

        <label for="password">Password:</label>
        <input type="password" id="password" name="_password"/>

        {# If you want to control the URL the user is redirected to on success
        <input type="hidden" name="_target_path" value="/account"/> #}

        <button type="submit">login</button>
    </form>

{% endblock %}
4.2 Formulario de registro
Es tan sencillo como ejecutar el comando php bin/console make:registration-form respondiendo a las preguntas que nos propone:
Do you want to add a @UniqueEntity validation annotation on your User class to make sure duplicate accounts aren't created? (yes/no) [yes]:
yes
Do you want to send an email to verify the user's email address after registration? (yes/no) [yes]:
no
Do you want to automatically authenticate the user after registration? (yes/no) [yes]:
yes
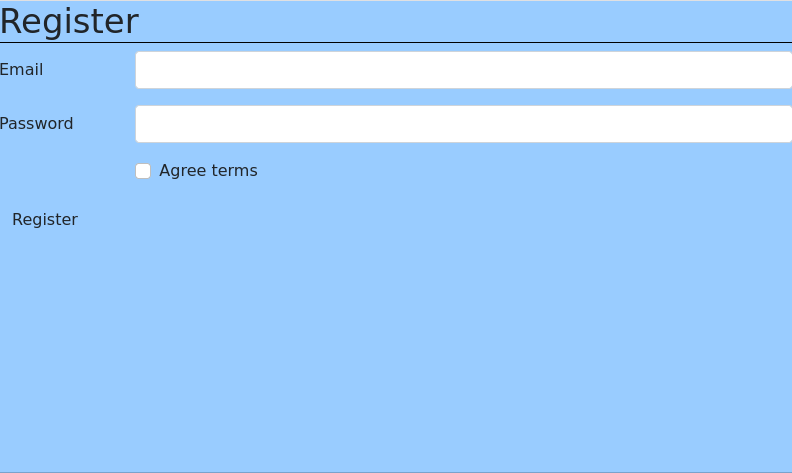
Se creará el controlador App\Controller\RegistrationController.php y la plantilla registration/register.html.twig
Ahora, si visitamos http://localhost:8080/register mostrará el formulario de registro:
4.3 Logout
Para habilitar el logout, hay que activar el parámetro logout en la configuración de seguridad:
    firewalls:
        ...
        main:
           ...
            logout:
                path: app_logout
Y creamos el controlador SecurityController.php, que simplemente crear la ruta /logout:
<?php
namespace App\Controller;

use Symfony\Bundle\FrameworkBundle\Controller\AbstractController;
use Symfony\Component\Routing\Annotation\Route;

class SecurityController extends AbstractController
{

    #[Route('/logout', name: 'app_logout', methods:["GET"])]
    public function logout(): void
    {
        // controller can be blank: it will never be called!
        throw new \Exception('Don\'t forget to activate logout in security.yaml');
    }
}
4.4 Hacer login con más de un campo
En el caso que queramos que el usuario se logee con el username o correo o cualquier otro dato, debemos modificar UserRepository para que implemente UserLoaderInterface y luego implementar el método loadUserByIdentifier
Por ejemplo;
...
use Symfony\Bridge\Doctrine\Security\User\UserLoaderInterface;
//Demás código

public function loadUserByIdentifier(string $usernameOrEmail): ?User
    {
        $entityManager = $this->getEntityManager();
        return $entityManager->createQuery(
            'SELECT u
                FROM App\Entity\User u
                WHERE u.email = :query
                OR u.username = :query'
        )
            ->setParameter('query', $usernameOrEmail)
            ->getOneOrNullResult();
Y modificar el archivo security.yaml para que no use el campo por defecto:
        app_user_provider:
            entity:
                class: App\Entity\User
                # property: email # o cualquier otra que hubiera
4.5 Contenido del archivo security.yaml
Os dejo el contenido completo por si tenéis algún problema:
security:
    enable_authenticator_manager: true
    # https://symfony.com/doc/current/security.html#registering-the-user-hashing-passwords
    password_hashers:
        Symfony\Component\Security\Core\User\PasswordAuthenticatedUserInterface: 'auto'
        App\Entity\User:
            algorithm: auto

    # https://symfony.com/doc/current/security.html#loading-the-user-the-user-provider
    providers:
        # used to reload user from session & other features (e.g. switch_user)
        app_user_provider:
            entity:
                class: App\Entity\User
                property: email
    firewalls:
        dev:
            pattern: ^/(_(profiler|wdt)|css|images|js)/
            security: false
        main:
            lazy: true
            provider: app_user_provider
            form_login:
                # "login" is the name of the route created previously
                login_path: login
                check_path: login
            logout:
                path: app_logout
            # activate different ways to authenticate
            # https://symfony.com/doc/current/security.html#the-firewall

            # https://symfony.com/doc/current/security/impersonating_user.html
            # switch_user: true

    # Easy way to control access for large sections of your site
    # Note: Only the *first* access control that matches will be used
    access_control:
        # - { path: ^/admin, roles: ROLE_ADMIN }
        # - { path: ^/profile, roles: ROLE_USER }

when@test:
    security:
        password_hashers:
            # By default, password hashers are resource intensive and take time. This is
            # important to generate secure password hashes. In tests however, secure hashes
            # are not important, waste resources and increase test times. The following
            # reduces the work factor to the lowest possible values.
            Symfony\Component\Security\Core\User\PasswordAuthenticatedUserInterface:
                algorithm: auto
                cost: 4 # Lowest possible value for bcrypt
                time_cost: 3 # Lowest possible value for argon
                memory_cost: 10 # Lowest possible value for argon
4.5 Restringir acceso a partes de la aplicación
https://symfony.com/doc/6.4/security.html#add-code-to-deny-access
4.6 Obtener el usuario actual
En un controlador
<?php
$this->getUser();
En twig
{{ app.user }}
Reto I
Añade un campo
namea la entidadUser. Modifica también el formulario de registro.
Reto II
- En la portada de la web crea una lista con todos los contactos. Cada elemento será un enlace a una página donde se muestran los detalles del mismo así como un botón para Editar y Modificar. Crea la lógica en el controlador para saber si el usuario ha pulsado en editar (guardar) o en borrar. En esta página explica cómo gestionar un formulario con varios botones.
- Crea un enlace para poder añadir un contacto.
- Donde sea necesario se ha de comprobar que el usuario está logeado y enviarlo a
/indexen caso contrario